Showing posts with label paper craft. Show all posts

Thursday, December 6, 2012

Japanese Flower Kusudama Ball


So today, we will be making a Japanese Flower Kusudama Ball. It's not actually that fitting for our 1-2-3 Thursdays since it takes a lot of time to make these, but then, we can squeeze it in from time to time.

The good (and bad) thing about maintaining servers is that I've got lots of free time when nothing is happening, so I decided to kill time by making these awesome flowers and made them into a ball! It's also a good way to curb hunger, sugar crash and sleepiness during work hours. ;)


These balls have so much potential! I even think they'll look great in weddings, a bouquet that my bridesmaids will carry, perhaps?


Materials for Japanese Flower Kusudama Ball

  • Glue


Tools for making Japanese Flower Kusudama Ball

  • scissors


How to make Japanese Flower Kusudama Ball


A huge factor in the outcome of this the color of paper you will use. I made my flowers from the pages of my Garfield Calendar which I received last Christmas. All I did was to cut them into squares to make the traditional square Origami paper. Since the paper is thin glossy paper, it's really easy to fold.

Ideally, you would want to use a larger paper so that the flowers look prettier. I suggest using magazines or old note and sticky note papers to make these.

I'm working on making a flower out of my used note papers here in the office, It will probably take a long time to complete, but at least I was able to upcycle my paper.

Over all, it took me about 5 hours to do this, of course that's with work going on in between making these. It also depends on how fast you fold and how quick your glue dries.

Check out these easy to follow tutorials on how to make the flowers and the Kusudama
    Balls From Folding Trees (Photo Instructions):
  1. Part 1: Making the Flowers
  2. Part 2: Making the Kusudama Ball

    From S Forrest in YouTube (Video tutorial:)
  1. Part 1: Making the Flowers
  2. Part 2: Making the Kusudama Ball

Thursday, March 29, 2012

How To: Origami Box

Did you ever have a small trinket to give but found yourself wondering how to wrap it? Or did you just want a box to declutter your desk without buying expensive boxes and desk organizers? Well then, you're in luck cause today, I will teach you how to make your own paper box without the mess of glue!

I found this tutorial a few months back about how to make paper boxes out of any sheet of paper. I haven't really had a practical use for it because so far, my desk organizer is working (throw everything in my drawer!) and I used to have an abundant supply of tissue paper rolls (and turn them into pillow boxes) for my small trinket/candy giving, but I ran out; so I had to think of a way to give out prizes for my org's monthly friday youth fellowship. Lo and behold! I had a use for the boxes!

Making them's easy-peasy! Let's get started!

Tools
  • Orange Scissors


Materials
  • Scrap Paper
  • Magazine Page


Steps

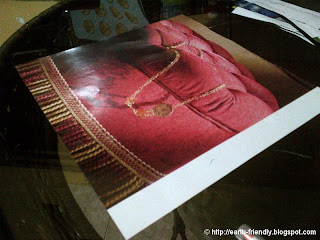
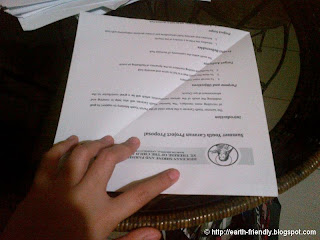
1. Make a square out of your paper.

If it's already square to begin with, fold one corner towards it's opposite corner
  • Fold a big triangle
  • Fold out the excess rectangle
  • Excess Rectangle
  • Cut Rectangle
  • Square Paper


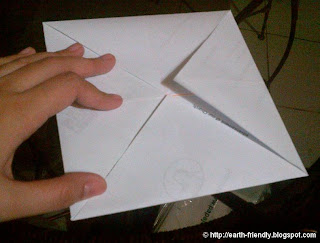
2. Fold the other corner towards its opposite corner

You should have an X-shape on your paper because of the fold. I labeled the fold with an orange pen to guide you.
  • Another Triangle Fold
  • X-shape fold


3. Get one corner of the paper and fold it to the center. Repeat for the other corners

  • Corner to Center Fold
  • All corners to center


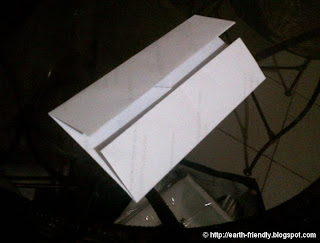
4. Fold one side of the square towards the center.

This will create a wide rectangle Repeat for the other side to make a slim rectangle
  • Wide Rectangle
  • Slim Rectangle


5. Flip the paper over. Fold one of the short sides of the rectangle towards the center. Repeat for the other side

  • Current Side
  • Flipped Side
  • Short to center
  • Other Short to Center


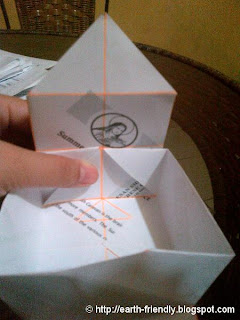
6. Open your paper.

Your paper should have a lot of small squares because of the folding. These squares will be your guide lines for making the box.

  • Open folds


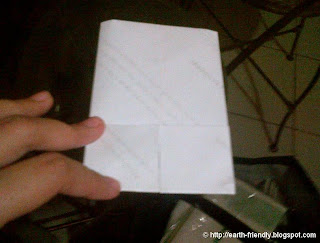
7. Snip on the 2 corners of your paper as shown below.

Make sure not to cut along the squares marked with an X (center squares). After cutting, you should be able to identify 2 triangle parts and 2 tower parts on your paper.

  • Snip corners
  • Triangle Part
  • Tower Part


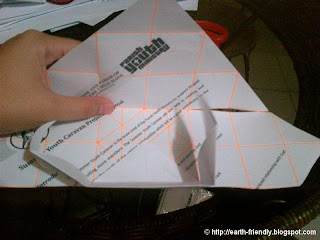
8. On one of the triangle parts, fold the corner tip, down towards the center squares.

When folding down, you will fold the small triangle (corner, tip) and 1 set horizontal set of squares. This will create one side of your box.

  • Triangle Part
  • Corner tip to center
  • Secure fold
  • What it should look like


9. Take the 2 flaps on either side of the folded down side, and fold 90 degrees. 

This will help in sealing and connecting the sides of your box.

  • Fold 90 deg


10. Repeat step 8 -9 for the 2nd triangle part

  • Triangle Part 2
  • Corner tip to center
  • Fold sides 90 deg
  • How it should look like


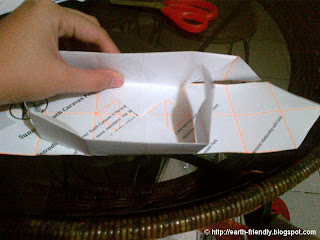
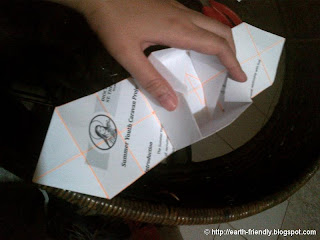
11. Take one of the tower parts on fold the corner tip towards the center of the box. 

Make sure that the extra flaps made in steps 8-10 are inside the folded tower. Repeat for the other tower.
  • Tower 1
  • Tower 1
  • Corner tip to center
  • Tower 2
  • Tower 2
  • Corner tip to center


12. To make a lid

Repeat steps 1-11 with a slightly bigger paper (around 1mm bigger along the sides)
It would be nice to use a different colored paper/magazines to create contrast in colors


Thursday, January 12, 2012

Tissue Paper Roll Craft: Treats Pillow Box

It's Thursday, so I thought I'd start my 1-2-3 Thursdays which are basically some craft or green action that you can do in a few minutes with the least number of materials.

This week's 1-2-3 Thursday is really fun and can be easily changed to fit any occasion. In my case, I made one for a little sweet nothing for my boyfriend. He absolutely loved it! He even joked that one of his drawers is already filled with notes and other stuff from me. He'll keep the box cause it's cute. WINNER!

Anyway, I saw the tutorial at Clean & Scentsible's Blog. It's so easy to make, not to mention ingenious. Makes me wonder why I didn't think of it before! Clean & Scentisble's blog have awesome pictures for the tutorial, mine has a low res pixelated one, so if you're particular about pictures head on over to her blog for a nice tutorial :)

This is my Treats Pillow Box


Anyway, here's my take on it:

Tool:
  • Orange Scissors

Materials:
  • cloud 9 chocolate
  • Tissue paper roll
  • Cute kitten sticky note
  • Left over craft paper
  • small brown paper bag

Step 1:

Fold one side of the end of the tube, inwards to create a flap

  • Tissue Paper Roll Craft Pillow Box

Step 2:

Fold the other side of the end of the tube inwards to create another flap.

The flaps are used to close off one end of tube. Repeat on the other end
  • Tissue Paper Roll Craft Pillow Box

Step 3:

Open one end and put your treats inside. Close the end again


Step 4:

Cut a thin strip of paper from a brown bag.


This will be used to create a twine

Step 5:

Twist the strip of paper to form a twine

    How to make paper twine
  • How to make paper twine

Step 6:

Seal the flaps by winding the twine around the pillow box.

Make a ribbon or a knot to secure the flaps and the twine. You can opt to finish the box here by making a horizontal wrap or decorate the box more (proceed with step 7)

Step 7:

Cut a strip of paper that can be used to wrap the mid-section of your pillow box.

Tape or glue the paper for a snug fit

Step 8:

Position your Note paper in the middle of the fastened strip of paper. Put some glue or tape and stick it to the strip of paper