Showing posts with label kitchen beauty recipes. Show all posts

Tuesday, March 27, 2012

How To: Homemade Pore Strip


So I've finally done it! I've done my own homemade pore strip (from Petite Elefant) I must say, it did leave my face feeling oh so smooth! SDEHBF (Super Duper Extra Hot BF) wanted to try it out as well (I was trying to convince him to put some on even before I actually whipped up the concoction and he wouldn't budge!), he didn't though. He was about to have dinner and was worrying about not being able to eat...

Anyway, I got good results. It didn't completely remove my whiteheads. Might have removed some of my blackheads. Not really as effective as I thought it would be. Pore strips aren't that effective anyway. I think the reason why it didn't remove as much as I expected is because I slathered it too thinly. I was afraid it would take a long time to set, like my last attempt (using agar agar or gulaman, failed attempt). This attempt, however, set properly and I was really happy with the results!

Tools

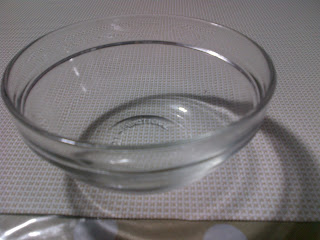
  • Small Glass Bowl
  • 1 Tablespoon Measuring Spoon


Ingredients
  • Knox Unflavored Gelatine
  • Milk Magic Full Cream Milk


Steps


1. Measure out 1 1/2 Tbsp of milk. 

I heated mine in the microwave to put it to room temp. I don't know of temperature is a factor. My milk came from the ref.

Note: You may need lesser, like just a teaspoon if you won't put it on your whole face, or someone (like 5 people) to share it with
  • 1 1/2 T Milk
  • Put to Room Temp


2. Measure 1 Tbsp of  of Gelatin. 

The one I used - Knox, is in pouches. 1Tbsp = 1 Pouch

 Note: You may need lesser, like just a teaspoon if you won't put it on your whole face, or someone (like 5 people) to share it with

  • 1 Pouch Knox Gelatine


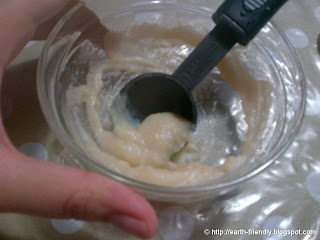
3. Mix the ingredients together

It becomes thick and sticky in an instant so mix well!

  • Thick Gelatin and Milk Mixture


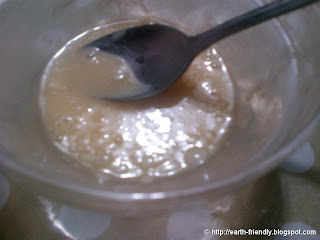
4. Pop it in the microwave for 20 seconds or less.

Maybe around 5 seconds if you're using just a teaspoon. The goal is to warm it up and make it spreadable.

  • Microwave for 20 seconds


5. Cool down the mixture

Maybe 20 seconds was too long, I dunno. All I know is after popping it in the microwave, it's too hot for my skin, so I cooled it down for a few minutes.

To test if the mixture is tolerable, dab a small amount on your wirst or the back of your hand (which are heat sensitive parts). If it's too hot, then it's definitely not ready for your face. Take note that your face is more sensitive
  • Runny because of heating
  • Cool down quickly


6. Apply on your face.

Don't apply too thickly (takes a long time to set), nor thinly (doesn't get much gunk out of your face). Make sure problem areas are covered.


7. Wait for it to set.

I applied mine too thinly so it took just 5 minutes to set.  It should be around 10-15 minutes (could be longer  if applied thickly)


8. Peel

CAUTION: It will hurt


9. Feel your newly peeled, soft skin!


Tuesday, March 13, 2012

How to: Easy Sugar Scrub - Clean and Smooth


I've been using this sugar scrub on and off for a couple of weeks now, and I must say that it really leaves my face feeling smooth and clean. Since I've tried and tested it, I know it works and I want to share to everyone how easy it is to make this sugar scrub. Perfect for lazy and cheapskate people like me who doesn't want to labor to much for a scrub, but wouldn't buy one.

Benefits

  • Cleans your face/skin
  • Removes excess oil that washing with soap doesn't remove
  • Removes dead skin
  • Leaves your skin smooth
  • Can be used for your whole body
  • C-H-E-A-P
This recipe is really very easy to make, not to mention cheap. It's so cheap you can use it for your whole body everyday. No kidding!

Materials
  • Repurposed lotion tub


Ingredients:
  • Sugar


How to make a Sugar Scrub:

Put sugar in your container

How to use a Sugar Scrub

Wet your face, preferably with warm water to open up your pores

Optional. Wash your face with soap and water

Get a handful of sugar

Slather the sugar all over your face

Scrub your face in light circular motions. Don't rub too hard or it might break your skin

Continue scrubbing until you get tired of it

Rinse with cool water to close your pores


That's it! Didn't I tell you how easy it is to make one?
You have to take not of a few things though:
  1. Make sure you rinse it thoroughly. Unwashed sugar might give you yeast infections, especially in areas of your body that are usually moist
  2. The sugar doesn't moisturize, so it's still best to put on moisturizer after
  3. Since it's only plain sugar, it doesn't have any long term effect.It only cleanses and leaves your skin smooth for the day, or until you have accumulated a lot of dirt on your face.
With that said, pick up those tushes and scrub away!

Thursday, November 10, 2011

Olive Oil Skin Softening Scrub

With all the good benefits and wonders of olive oil for the body, I wondered whether it can be used on the face as well. So I went to trusty Google and found out that a lot of homemade skin-care recipes have olive oil in it.

Use of Olive Oil on Skin
I'm not particularly sure if my skin is oily or dry. Sometimes it's oily, sometimes it's dry, but a lot of websites don't recommend olive oil if your skin is already oily. Makes perfect sense!

I have a lot of black and white heads and I thought that maybe the olive oil scrub will help me wash them away. I wasn't successful in removing the black- and whiteheads after just 1 try, and I haven't had the time to repeat it, but maybe my face will clear up with continued use?

Effect of Olive Oil on Skin
The effect of my Olive Oil Skin Softening Scrub (let's call it a potion) is that my face felt really smooth, supple, and clean. I had a lot of extra scrub potion that I was able to use it for my feet which are dry and a little cracked. My feet felt really soft. So did my hands, after applying the potion to my face and feet.

So how did I make my potion? Here's how:

How to Make Olive Oil Skin Softening Scrub

Ingredients
  • extra virgin olive oil
  • brown sugar
  • Fluffy face towel


Materials
  • Small bowl for mixing the olive oil and sugar
  • Spoon or teaspoon for measuring and mixing
  • Face towel
  • Tabo (dipper) or small basin to soak the face towel


Step 1:  Mix the Olive Oil and Sugar together to make the scrub


Step 2: Wash and clean your face with warm water to open your pores.


Step 3: Soak towel in warm-to-hot water


Step 4: Apply the scrub on your face in gentle circular motions


Step 5: Let the scrub sit for at least 5 minutes.


Step 6: Rinse the scrub with warm water


Step 7: Place the warm towel over your head for at least 5 minutes


Step 8: Wash your face with cool-to-cold water to close your pores