Showing posts with label earth friendly gift wrapping. Show all posts

Thursday, March 29, 2012

How To: Origami Box

Did you ever have a small trinket to give but found yourself wondering how to wrap it? Or did you just want a box to declutter your desk without buying expensive boxes and desk organizers? Well then, you're in luck cause today, I will teach you how to make your own paper box without the mess of glue!

I found this tutorial a few months back about how to make paper boxes out of any sheet of paper. I haven't really had a practical use for it because so far, my desk organizer is working (throw everything in my drawer!) and I used to have an abundant supply of tissue paper rolls (and turn them into pillow boxes) for my small trinket/candy giving, but I ran out; so I had to think of a way to give out prizes for my org's monthly friday youth fellowship. Lo and behold! I had a use for the boxes!

Making them's easy-peasy! Let's get started!

Tools
  • Orange Scissors


Materials
  • Scrap Paper
  • Magazine Page


Steps

1. Make a square out of your paper.

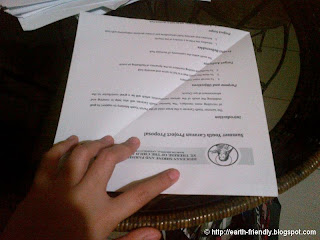
If it's already square to begin with, fold one corner towards it's opposite corner
  • Fold a big triangle
  • Fold out the excess rectangle
  • Excess Rectangle
  • Cut Rectangle
  • Square Paper


2. Fold the other corner towards its opposite corner

You should have an X-shape on your paper because of the fold. I labeled the fold with an orange pen to guide you.
  • Another Triangle Fold
  • X-shape fold


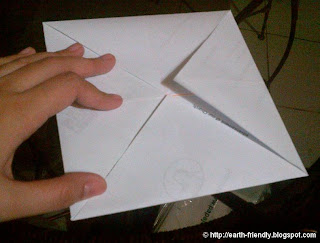
3. Get one corner of the paper and fold it to the center. Repeat for the other corners

  • Corner to Center Fold
  • All corners to center


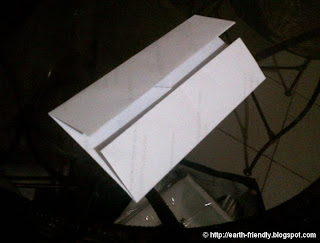
4. Fold one side of the square towards the center.

This will create a wide rectangle Repeat for the other side to make a slim rectangle
  • Wide Rectangle
  • Slim Rectangle


5. Flip the paper over. Fold one of the short sides of the rectangle towards the center. Repeat for the other side

  • Current Side
  • Flipped Side
  • Short to center
  • Other Short to Center


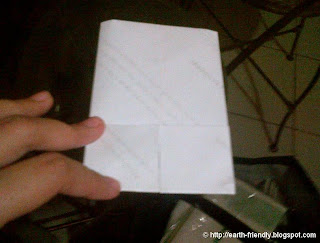
6. Open your paper.

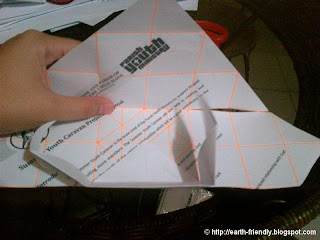
Your paper should have a lot of small squares because of the folding. These squares will be your guide lines for making the box.

  • Open folds


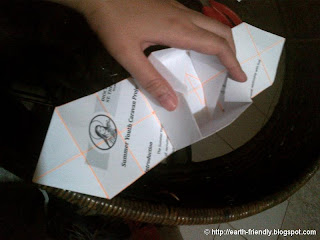
7. Snip on the 2 corners of your paper as shown below.

Make sure not to cut along the squares marked with an X (center squares). After cutting, you should be able to identify 2 triangle parts and 2 tower parts on your paper.

  • Snip corners
  • Triangle Part
  • Tower Part


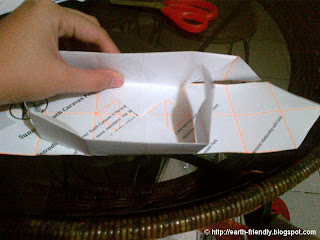
8. On one of the triangle parts, fold the corner tip, down towards the center squares.

When folding down, you will fold the small triangle (corner, tip) and 1 set horizontal set of squares. This will create one side of your box.

  • Triangle Part
  • Corner tip to center
  • Secure fold
  • What it should look like


9. Take the 2 flaps on either side of the folded down side, and fold 90 degrees. 

This will help in sealing and connecting the sides of your box.

  • Fold 90 deg


10. Repeat step 8 -9 for the 2nd triangle part

  • Triangle Part 2
  • Corner tip to center
  • Fold sides 90 deg
  • How it should look like


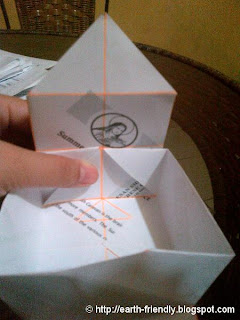
11. Take one of the tower parts on fold the corner tip towards the center of the box. 

Make sure that the extra flaps made in steps 8-10 are inside the folded tower. Repeat for the other tower.
  • Tower 1
  • Tower 1
  • Corner tip to center
  • Tower 2
  • Tower 2
  • Corner tip to center


12. To make a lid

Repeat steps 1-11 with a slightly bigger paper (around 1mm bigger along the sides)
It would be nice to use a different colored paper/magazines to create contrast in colors


Thursday, March 15, 2012

How To: Produce Tote Bag From T Shirt


I saw this cute produce bag from http://www.ecouterre.com/. It's a DIY tutorial, teaches you how to make a produce bag out of an old t-shirt.


Looks pretty easy so I decided to make one for our 1-2-3 Thursdays. Although this may be more difficult than our usual short crafts, it's still very easy to make, won't take you more than half a day. I wouldn't know how much time exactly I spent making this since I did it on and off, at home, while at the office, while at Starbucks waiting for SDEHBF. (Yes, I had the guts to finish this up at Starbucks. I had 2 hours to kill!).

So anyway, you can head on over to Ecouterre for the original tutorial or stay here and see how I did it. I have to warn you though, I was never good at sewing and if the pictures in Ecouterre weren't cute and the instructions weren't easy enough to follow, I wouldn't have done this. Sewing and I don't go together. It's been this way ever since I can remember; So please don't let me hear you laughing at how uneven my stitches are. Not even a smirk!

Tools Needed:
  • School Scissors
  • Pen
  • Red X-Acto Knife
  • ruler


Materials Needed:
  • Yellow cotton shirt
  • Needle and Thread


Steps:

1. Lay the t-shirt flat

  • Yellow cotton shirt

2. Draw the shape of your tote bag. This shape would be the lines that will cut along later

  • Draw bag shape
  • Draw bag shape

3. Cut the shirt according the shape of your bag

  • cut bag shape

4. Sew all the 2 pieces of cloth together, Do not sew the bag opening (Shirt Opening)

  • backstitch

Sorry, I don't have a camera with macro, so you have to squint and stare to see my awful stitching

5. Draw dashes across the cloth starting at the 4inch line from the bag opening. Draw a dash 2 inches from the bag opening. This will serve as your handle

  • 2in & 4in mark
  • Don't use long dashes
  • Use small dashes

The 4 inch and 2 inch measurements would differ depending the size of your bag. Since mine was large, my handle was 2 inches from the opening and the lines started 6 inches from the opening. Make sure that your dashes are small. Depends on how large your bag is though. My dashes were so long (which meant that the cuts were long) that you risk your items falling out of the bag. An ideal measurement would probably be 1 inch dashes, and 1/2 inch space between the dashes. It's also good to note that you don't dash until the end/bottom of your bag. Leave at least a 4 inch allowance.

6. Cut along the dashes that you drew

  • Cut along dashes
  • Use sharp scissors

So my mistake in this bag was my dashes were too long and were too near the bottom of my bag

7. Stretch your bag

  • Stretch bag
  • Put in items


My bag will spew out the items inside when you try to move it around. Also, since my cloth is weak (thin) cotton, chances of ripping is big too. So remember. SMALL DASHES.

I'd probably try again once I find a few old shirts that I can turn into tote bags. I'm planning on selling those stuff. What do you think?

Optional: Add straps to your produce tote bag. (Will try to do this if I have the time)
1. Using the left over cloth, measure your desired strap length. Width should be about 4 inches + 1/4 inch seam allowance.
2. Cut along the the lines. Make sure to make 2 pieces of this.
3. Fold the cloth wrong side out. Stitch the open long side and one of the open short sides
4. Turn the sewn strip inside out to reveal the right side of the cloth.
5. Repeat step 3 and 4 for the second strap
6. Sew the straps on the bag