In just a few hours, it\s already Earth Hour.
Just reminding everyone to switch-off your lights at 8:30 PM - 9:30 PM Tonight!
I forgot to post my IWIYW pledge, so I'm posting it here now:
Pages
▼
Saturday, March 31, 2012
Friday, March 30, 2012
Green-tionary
I'm launching a Green-Tionary here in my blog. It's a dictionary of terms that are commonly used when we're talking green stuff. Some of the words, we can easily understand, some have a different meaning when use in green-speak than the original meaning of the word.
It's still incomplete, as I haven't had the time to put the meaning of all the words in lay-man's terms. Help me expand this dictionary. If you have words to add, alternative meanings to the word, or maybe even a correction on some of the words or their meanings, just hit the comment box here, or at the Green-tionary page.
Emjoy!
http://earth-friendly.blogspot.com/p/green-tionary.html
Thursday, March 29, 2012
How To: Origami Box
Did you ever have a small trinket to give but found yourself wondering how to wrap it? Or did you just want a box to declutter your desk without buying expensive boxes and desk organizers? Well then, you're in luck cause today, I will teach you how to make your own paper box without the mess of glue!
I found this tutorial a few months back about how to make paper boxes out of any sheet of paper. I haven't really had a practical use for it because so far, my desk organizer is working (throw everything in my drawer!) and I used to have an abundant supply of tissue paper rolls (and turn them into pillow boxes) for my small trinket/candy giving, but I ran out; so I had to think of a way to give out prizes for my org's monthly friday youth fellowship. Lo and behold! I had a use for the boxes!
Making them's easy-peasy! Let's get started!
Tools
Materials
Steps
It would be nice to use a different colored paper/magazines to create contrast in colors
I found this tutorial a few months back about how to make paper boxes out of any sheet of paper. I haven't really had a practical use for it because so far, my desk organizer is working (throw everything in my drawer!) and I used to have an abundant supply of tissue paper rolls (and turn them into pillow boxes) for my small trinket/candy giving, but I ran out; so I had to think of a way to give out prizes for my org's monthly friday youth fellowship. Lo and behold! I had a use for the boxes!
Making them's easy-peasy! Let's get started!
Tools
Materials
Steps
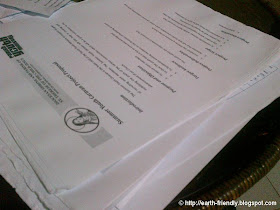
1. Make a square out of your paper.
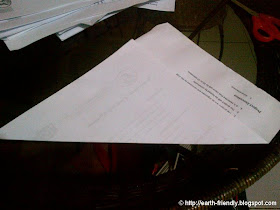
If it's already square to begin with, fold one corner towards it's opposite corner2. Fold the other corner towards its opposite corner
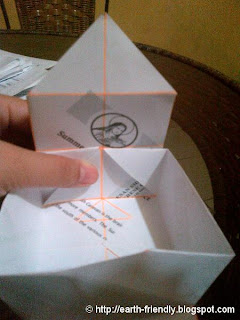
You should have an X-shape on your paper because of the fold. I labeled the fold with an orange pen to guide you.3. Get one corner of the paper and fold it to the center. Repeat for the other corners
4. Fold one side of the square towards the center.
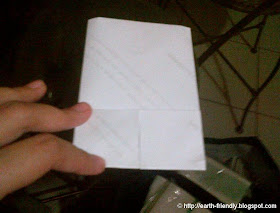
This will create a wide rectangle Repeat for the other side to make a slim rectangle5. Flip the paper over. Fold one of the short sides of the rectangle towards the center. Repeat for the other side
6. Open your paper.
Your paper should have a lot of small squares because of the folding. These squares will be your guide lines for making the box.7. Snip on the 2 corners of your paper as shown below.
Make sure not to cut along the squares marked with an X (center squares). After cutting, you should be able to identify 2 triangle parts and 2 tower parts on your paper.8. On one of the triangle parts, fold the corner tip, down towards the center squares.
When folding down, you will fold the small triangle (corner, tip) and 1 set horizontal set of squares. This will create one side of your box.9. Take the 2 flaps on either side of the folded down side, and fold 90 degrees.
This will help in sealing and connecting the sides of your box.10. Repeat step 8 -9 for the 2nd triangle part
11. Take one of the tower parts on fold the corner tip towards the center of the box.
Make sure that the extra flaps made in steps 8-10 are inside the folded tower. Repeat for the other tower.12. To make a lid
Repeat steps 1-11 with a slightly bigger paper (around 1mm bigger along the sides)It would be nice to use a different colored paper/magazines to create contrast in colors
Wednesday, March 28, 2012
Dr. Seuss The Lorax Motion Picture
Last week, SDEHBF (Super Duper Extra Hot BF) and I finally went out on a date, after more than a month! We were both excited, and we just wanted each others' company without spending too much or eating out. So we settled for a movie. I'm no movie-goer unless it's cartoons or a local flick. Since he doesn't want to watch a local one, we opted to watch Lorax. I had my reservations at first (Dr. Seuss movies tend to be boring), but hey, it's a cartoon and it's about trees, so why not.
It's a nice movie, with the usual Dr. Seuss environment and an exaggeration blown up to proportions; or so I thought. The story starts in Thneedville (see the song lyrics for how the movie described Thneedville), a place where everything is artificial, and fresh air is being sold, I was like, "Yeah typical Dr. Seuss storybook, NEXT!". The story progressed and I was shocked at how real the story was turning in to. Sure, there still are trees now, and there still is fresh air, but before we know it, the world will turn into Theedville. The story told exactly how it happened there, and what happened there is slowly happening here, and it's as real as it gets, and it's all through song coupled some scary, kick-ass cartoon animation.
Check out these lyrics from MetroLyrics.com and STLyrics.com:
Biggering
http://www.metrolyrics.com/biggering-lyrics-gabriel-mann-randy-crenshaw-the-88-the-lorax-singers.html
How Bad Can I Be
http://www.stlyrics.com/lyrics/drseussthelorax/howbadcanibe.htm
These songs pretty much describe what's happening right now. Commercialism and capitalism. Selfishness and pride. All these contribute to the destruction of our environment, of our world.
I was on teary-eyed when the Once-ler chopped the first tree then Lorax and the forest animals built a ring of stone around the stump! It was so heartbreaking. I really broke into tears when the Once-ler sang Biggering and How Bad Can I Be. The lyrics was so real. It scared me, really scared me.
Everyone should watch this movie, and have their eyes opened. Thneedville isn't too far ahead in our future. I hope the movie (and the book) will turn more people for the environment.
Tuesday, March 27, 2012
How To: Homemade Pore Strip
So I've finally done it! I've done my own homemade pore strip (from Petite Elefant) I must say, it did leave my face feeling oh so smooth! SDEHBF (Super Duper Extra Hot BF) wanted to try it out as well (I was trying to convince him to put some on even before I actually whipped up the concoction and he wouldn't budge!), he didn't though. He was about to have dinner and was worrying about not being able to eat...
Anyway, I got good results. It didn't completely remove my whiteheads. Might have removed some of my blackheads. Not really as effective as I thought it would be. Pore strips aren't that effective anyway. I think the reason why it didn't remove as much as I expected is because I slathered it too thinly. I was afraid it would take a long time to set, like my last attempt (using agar agar or gulaman, failed attempt). This attempt, however, set properly and I was really happy with the results!
Tools
Ingredients
Steps
1. Measure out 1 1/2 Tbsp of milk.
I heated mine in the microwave to put it to room temp. I don't know of temperature is a factor. My milk came from the ref.
Note: You may need lesser, like just a teaspoon if you won't put it on your whole face, or someone (like 5 people) to share it with
2. Measure 1 Tbsp of of Gelatin.
The one I used - Knox, is in pouches. 1Tbsp = 1 Pouch
Note: You may need lesser, like just a teaspoon if you won't put it on your whole face, or someone (like 5 people) to share it with
3. Mix the ingredients together
It becomes thick and sticky in an instant so mix well!
4. Pop it in the microwave for 20 seconds or less.
Maybe around 5 seconds if you're using just a teaspoon. The goal is to warm it up and make it spreadable.
5. Cool down the mixture
Maybe 20 seconds was too long, I dunno. All I know is after popping it in the microwave, it's too hot for my skin, so I cooled it down for a few minutes.
To test if the mixture is tolerable, dab a small amount on your wirst or the back of your hand (which are heat sensitive parts). If it's too hot, then it's definitely not ready for your face. Take note that your face is more sensitive
6. Apply on your face.
Don't apply too thickly (takes a long time to set), nor thinly (doesn't get much gunk out of your face). Make sure problem areas are covered.
7. Wait for it to set.
I applied mine too thinly so it took just 5 minutes to set. It should be around 10-15 minutes (could be longer if applied thickly)
8. Peel
CAUTION: It will hurt


