Wednesday, December 21, 2011

Free Gift Wrapper: How to Spend Nothing on Gift Wrapping

Well, almost nothing. Wrapping gifts would depend on your ingenuity and creativity. All you need are materials that you already have on hand. If ever, the material that you'll only need to buy would be sticky transparent tape (more commonly known here in the Philippines as "Scotch Tape") and some glue (which I doubt you don't have already.

After buying your gift, you still need to wrap it and it can be so frustrating to think about how much you'll spend for gift wrappers and ribbons, all the while thinking about how much of the environment is being destroyed by our merry making. Wrapping paper isn't that recyclable since some of it contain non recyclable materials like glitter, and tape.

Now we have to think of ways to reduce our trash without dampening that Christmas Spirit. Sure recycling wrapping paper is good but it looks frayed when reused, plus it's more fun to tear out the wrapping paper when opening gifts!

So what do you need to do to be able to wrap those gifts without spending anything (or almost)? Just look around you. and be imaginative.


Sources of Free Gift Wrapping Materials:
  1. Home
  2. School
  3. Office

Free Gift Wrappers that can be Found at Home

  1. Old wrapping paper
  2. Papers, especially those reject prints and double sided print outs
  3. Old books (gasp) that are to be recyled, especially cookbooks that have pictures
  4. Old magazines and newspapers
  5. Old greeting cards
  6. Fabrics from old clothes, curtains, blankets, etc
  7. Craft leftovers
  8. Old and/or broken decorations
  9. Old small toys, pendants and other knicnacks that can be used as danglers and tags
  10. Boxes that came in with new stuff
  11. Bubble wrap

Free Gift Wrappers that can be Found in School

  1. Old test papers. Teachers usually just require this quarter's tests and seatworks. To be safe, you can use last year's test papers
  2. School memos and bulletins. All you have to do with those is to return the reply slip. Instead of throwing the paper away, use it to wrap gifts
  3. Fabric from old school uniforms that cant be handed down. repaired, or is too small to fit.
  4. Old art supplies that are being kept for future (but no apparent) use. Like art and construction paper which we keep on buying a new pack when the color we want to use was already used up in a previous project

Free Gift Wrappers that can be Found in the Office

  1. Papers that are no longer needed and can't be reused (i.e. papers that are printed on both sides)
  2. Boxes that will just be thrown out. Comapanies keep the bigger boxes for storage, but some boxes that are too small or too weak are thrown out. (Think pen boxes, permanent and whiteboard marker boxes, etc)
  3. Used up rolls of tape that can be used as a dangler (you still need to decorate it)
  4. Shredded paper in the paper shredder bin
  5. Old CDs that contain obsolete software or old files that won't be needed any more (or the data in the CD can also be found in a different CD with more updated data, etc)
Just make sure that the items that you take aren't going to be used anymore and doesn't contain any trade secrets nor confidential data.

Now that you know you can spend nothing on wrapping, skip the yuletide wrapping paper and tags and opt for a more earth-friendly wrapper.

Tuesday, December 20, 2011

DIY Gift Ribbon Using Paper

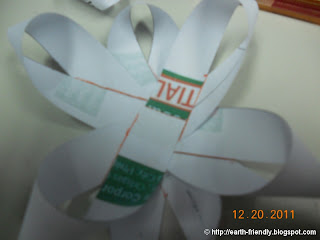
When I saw this tutorial on how to make your own gift ribbon using paper on how about orange, I was dying to try it out immediately, which I did. Twice to be exact, but I wasn't able to take pictures as I did it. I made another ribbon this morning and I think I'm really getting the hang of it. I took pictures this time and the ribbon was really adorable!

  • DIY earth friendly ribbon

I used regular office paper with one side printed on. Below is my take on how about orange's paper gift bow.

Materials and Tools Needed:

  • Ruler
  • Orange Scissors
  • Artline Glue Stick
  • Orange Mechanical Pencil


Step 1: Cut 9 Paper strips

  • Three (3) strips measuring the full 11 inches, 3/4 inches thick *
  • Three (3) strips measuring 10 inches, 3/4 inches thick *
  • Two (2) strips measuring 9 inches, 3/4 inches thick *
  • One (1) strip measuring 3 1/2 inches., 3/4 inches thick *
*This is assuming you're using a short bond paper (8 1/2 x 11 inches)

  • Paper strips for paper ribbon


Step 2: Twist and loop one end of the strip

Bring the end of the strip to the center to form one end of the ribbon. Hold it in place with your hand
  • Forming a paper riblet


Step 3: Twist and loop the other end of the strip

Bring the end of the strip to the center to form the other end of the ribbon. Hold it with your other (free) hand
  • Forming a paper riblet


Step 4: Adjust the ends of the strip to make the loops thinner.

The thinner it is, the better. Having wide or big ribbon loops will make it difficult to assemble the ribbon, not to mention that the ribbon will look cluttered with very wide loops.

  • Forming a paper riblet


Step 5: Mark the places where the loops or ends of the strip meet.

Make sure you also mark the corners where the loops are. This is to ensure that you will be able to put back the loops later.

  • Forming a paper riblet


Step 6: Glue the ends of the strip together

Apply the glue inside the marked areas in step 5 and stick the ends together. The lines you placed in Step 5 will help you form the shape of your strip without a hitch! Repeat this step with all the strips of paper except for the smallest (3 1/2 inch) strip. Form a ring with this strip instead. Group the riblets (the form the strips take after gluing together the ends) together according to length.

  • Forming a paper riblet
  • Finished riblet
  • twisted and looped riblets


Step 7: Form the base of the ribbon

Using the 3 longest riblets, form the base by creating a cross or plus-sign (+) with 2 riblets then place the last riblet at an angle that forms an X with the riblet on top. Make sure that you put glue at the center of each riblet or stack of riblets
  • Paper ribbon base


Step 8: Form the second layer of the ribbon

Using the 3 mid-length riblets, form the 2nd layer by placing the riblets in areas where the loops don't overlap with the other riblet loops. Again, make sure that you put glue at the center of the ribbon we're forming
  • Paper ribbon 2nd layer

Step 9: Form the 3rd layer of the ribbon

Using the 2 small riblets, form the 3rd layer by placing the riblets in areas where the loops don't overlap with the other riblet loops. At this point it's hard to find an angle to put in the 3rd layer riblets, but you'll manage. Again, make sure that you put glue at the center of the ribbon we're forming.
  • Paper ribbon 3rd Layer


Step 10: Finish the ribbon

Put the loop at the middle of the ribbon to finish it. My loops looks small because I flattened my riblets a lot during stacking, which left a big gap at the middle. I can opt to add more smaller sized riblets or just place a bigger paper ring inside


So what are you waiting for? Go forth and make these neat-o and pretty ribbons for your gift wrapping and decorating needs. This is exactly what I needed to wrap my revelation day present for the Kris Kringle that my friends and I started way back in November.

Eco Friendly Wrapping Paper, Gift Tags, Ribbons and Other Gift Toppers

Christmas is just 4 days away, by now we should all be done shopping and start wrapping those presents we bought.

There is no doubt that Christmas is one of the most (if not the most) expensive holiday, not to mention, wasteful. Can you imagine how much wrapping paper, ribbons and boxes are thrown out each year? According to www.recyclenow.com wrapping paper not always recyclable. Quoting from their website:
  • wrapping paper is often dyed, laminated and/or contains non-paper additives such as gold and silver coloured shapes, glitter, plastics etc which cannot be recycled;
  • some wrapping paper is very thin and contains few good quality fibres for recycling; and
  • a lot of wrapping paper has sticky tape attached to it which makes it very difficult to recycle.
Which is why we ought to use wrapping paper that can be easily recycled or even better, re-used! Below is a list of gift wrapping ideas/gift wrapper and gift topper alternatives

Gift Wrapping Ideas
  1. Use recycled wrapping paper
  2. Use boxes (Opt for boxes that our sturdy and pretty enough to be reused)
  3. Use fabrics (Such as towels, scarves, doilies, etc)
  4. Use gift baskets
  5. Use magazine pages, newspaper pages (comics and colored pages are best), maps, this year's calendar (especially the art/designed part of the calendar)
Gift Topper Ideas
  1. Use small old toys as danglers
  2. Make your own gift tags
  3. Create a classy paper-ribbon (just like what howaboutorange did!)

Monday, December 19, 2011

Great and Eco-Friendly Christmas Deals and Bargains at Handyman

Christmas is just a few days away and I'm sure a lot of us aren't done with our Christmas shopping yet.With the 13th month pay and company bonuses that we have, we'll probably replace some of our old stuff and get some new and shiny ones.

Yesterday, while out Christmas shopping with SDEHBF (super-duper extra hot boyfriend), we went to Handyman to check out their pet supplies, we didn't find what we were looking for, but I did find something that made me smile. It's Handyman's Trade-In Promo. Trade in your old and/or broken stuff, and then you'll get a discount for your new purchase! I'm guessing that the the old stuff will be up for recycling! What a great idea!


  • Handyman power tool trade-in
  • Handyman power tool trade-in

Tuesday, December 6, 2011

Changes and What to Expect in Earth-Friendly Green Living

I haven't been able to post for quite some time now. I've been busy with a lot of personal matters that I haven't had time to blog. I've been keeping up with green news and thinking about a lot of green crafts but to be honest, my creative juices and writing mojo seem to be in all-time low lately. Every time I attempt to blog about something, or to even start crafting, my energy drops and I slump back in bed.

I guess it's because I've been sick lately and have spent the time recuperating and taking a break from a lot of things that I've been doing. I just kept work, church-work, family time and kitty (boyfriend) time as my load and took a break from everything else. I haven't fully recovered yet but I can't bare leaving my blog empty for a month.

During the time that I wasn't blogging, I kept on thinking about ways to rev up my blog. I thought about making a banner at the beginning of every post. The banner would depend on what kind of article the post is about. While thinking about the banners that I'll make, an idea struck me, why don't I follow a schedule of what to post everyday? It's like giving a theme as to what the topic the post would be. That way, I wouldn't have a hard time thinking about what to post! Yeah! It really does sound like a great idea. It gives my blog structure and predictability.

So I started tapping away on my keyboard. Thinking about what the topics would be and what I would call them. I'm pretty happy with what I've come up with but I'd like to know what you think about it

  •  Monday Green Day
    • Green News
    • Green Innovations
    • Green Events
    • I placed this on a Monday to keep us inspired in this hard-to-start-working day
  • Kitchen Beauty Tuesday
    • Beauty products straight from your kitchen
    • I decided to put it on Tuesdays to prepare for Friday night-outs
  • Green Living Wednesday
    • Topics and tips on how to live a greener life
      • Green Office/Green Employee
      • Green School/ Green Student/Green Faculty/ Green Parent
      • Green Home
    • I placed this on a Wednesday as a pick-me-upper for the droning week
  • 1-2-3 Thursdays
    • DIYs and simple crafts that you can do in 5-30 minutes.
    • Some green ideas that you can do to pass the time
    • I decided to put this on Thursdays to keep us sane until the weekend comes
  • Green Friday Shopping
    • Product reviews. Which products you should and shouldn't buy
    • This is on a Friday because usually, we go out on Fridays, either to hang out with friends and family or to shop, these product reviews will help us make decisions when buying
  • Craft Weekend
    • DIYs and crafts that need time and (sometimes) a lot of materials
    • I placed this on weekends because this is when we have time to go crazy with out crafts and share the fun with family and friends
I do hope this got you excited. These changes really are exciting my mojo. I've started working on the banners, and hopefully be able to finish before the weekend starts (Hello late nights! O.O ).

Please bear with me as this changes will be a little slow on progressing. I might not be able to post everyday as I used to, especially after this weekend, since kitty and I plan to add a new member to our (fragmented - cause we're not living together) family. We'll pick her up over the weekend, so be prepared to read a lot of cat care tips here as well.

So, that's all the time I have for tonight. I need to get back on those banners.

Wednesday, November 23, 2011

Toilet Paper Roll Flowers

I have a vast number of tissue paper rolls thanks to my office mates. I have so many that I don't even know what to do with them anymore, so I scoured Google for ideas, and I just have to share these 2 with you:


These are wonderful and decorative ideas for tissue paper rolls - not to mention easy, and I can't wait to get started on these. I can see a few of these flowers sitting prettily on my office desk.

For tutorials on how to make these flowers, you can visit:

http://impressyourkids.org/earth-day-recycled-art-paper-tube-flowers/ for the daisy

and

http://designbynight.blogspot.com/2010/08/paper-towel-roll-flowerstuturial.html for the camellia

So what are you waiting for? Get those art materials out and start decorating!

Thursday, November 17, 2011

Tissue Paper Roll Candy Wrapper

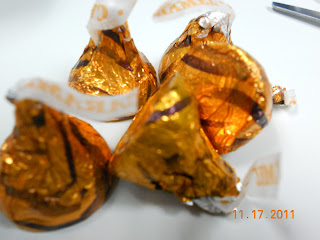
I've been feeling a little off lately that got my ever loving boyfriend worried. He really went out of his way to make me feel better. To show him a small token of my appreciation, I decided to give him a few pieces of Hershey's Caramel Kisses. I know he'd love them even if I just hand it out to hm, but I thought a little extra effort wouldn't hurt.
I have a lot of tissue paper rolls here so I thought I'd make use of it to wrap the kisses with.

Here's the Finished Product:

Materials for Toilet Paper Roll Recycled Candy Box


Cut the TP roll to match the size that you need to contain your candies


Cut one side of the TP Pulls wrapper to elongate the wrapper


Cut 2 strips from the cut-out side of the wrapper (Ribbons)


Put the candies inside the TP Roll


Put the candy filled TP roll inside one the pocket of the wrapper and wrap like a candy


Tie the ribbons at the ends of the wrapped candy


When I gave him what I made, he looked a little surprised and smiled at me, asking me why. I'm glad he really liked how I wrapped it. It added intrigue as to what's inside since it's so obvious that it was wrapped with recycled stuff.

Staple Free Stapler at Think Geek

I was scouring the net for green office products to buy for myself when I saw this stapler in ThinkGeek! The moment I saw it, my geek-meter went on overload and my green idea light bulb exploded! Oh yeah! This is wicked!!!

Why is the Staple-Free Stapler Earth-Friendly

The staple-free stapler, doesn't need staples to bind paper together, which helps us reduce our consumption of staple wires which are very dangerous pollutants. (Imagine animals ingesting this, imagine you ingesting this). Not to mention reducing the accidents relating to staple wires. Blood, gore, and a heap of papery mess.

How the Staple-Free Stapler Works

It works by cutting flaps from the paper, folding the paper flaps the opposite direction, and then inserting the flaps in a slit it created. It uses the actual paper it's supposed to bind together to bind it together. Neat-o! There are some products on the Internet that offer customization of the stapler to add a logo on the last flap. Cool-io!
  • stapless stapler
  • cut and slit

Available Designs and Colors
  • Clear-colored staple free stapler
  • Clear-colored staple free stapler
  • Clear-colored staple free stapler
  • Clear-colored staple free stapler

Tuesday, November 15, 2011

Plastic Bottle Trash Can

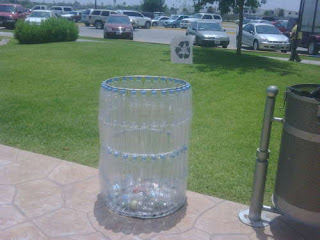
While Surfing on the Internet yesterday, I saw this cool idea for reusing plastic bottles.
  • Plastic Bottle Trash Can

I saw this over instructables.com with instructions on how to do it. The instructions aren't very clear, but the concept of making it isn't very difficult (or so I think).

Now the next question, would I start collecting bottles just so I can make this? I don't drink soft drinks so it would be difficult for me to consume oodles of it jut to make a trashcan. I don't buy that much bottled drinks either. Being able to make this would be a matter of how often you consume bottled beverages, which is, bad for the environment. You could however still make this, let's say, you have the bottles up for recycling, or you had a party of some sort. It's a nice way to reuse plastic bottles nonetheless.

Friday, November 11, 2011

Eco Bag Reminder from Cosmo PH

I recently bought the November issue of Cosmopolitan Philippines, in the hopes of finding some neat styles I can donne on.

While skimming through the first few pages of the magazine, I saw this filler article about the use of eco bags. I absolutely loved how they put it together, it summarizes what I have in mind about eco bags!


Kudos to the Cosmo PH team for taking a stand for Mother Nature!

Thursday, November 10, 2011

Olive Oil Skin Softening Scrub

With all the good benefits and wonders of olive oil for the body, I wondered whether it can be used on the face as well. So I went to trusty Google and found out that a lot of homemade skin-care recipes have olive oil in it.

Use of Olive Oil on Skin
I'm not particularly sure if my skin is oily or dry. Sometimes it's oily, sometimes it's dry, but a lot of websites don't recommend olive oil if your skin is already oily. Makes perfect sense!

I have a lot of black and white heads and I thought that maybe the olive oil scrub will help me wash them away. I wasn't successful in removing the black- and whiteheads after just 1 try, and I haven't had the time to repeat it, but maybe my face will clear up with continued use?

Effect of Olive Oil on Skin
The effect of my Olive Oil Skin Softening Scrub (let's call it a potion) is that my face felt really smooth, supple, and clean. I had a lot of extra scrub potion that I was able to use it for my feet which are dry and a little cracked. My feet felt really soft. So did my hands, after applying the potion to my face and feet.

So how did I make my potion? Here's how:

How to Make Olive Oil Skin Softening Scrub

Ingredients
  • extra virgin olive oil
  • brown sugar
  • Fluffy face towel


Materials
  • Small bowl for mixing the olive oil and sugar
  • Spoon or teaspoon for measuring and mixing
  • Face towel
  • Tabo (dipper) or small basin to soak the face towel


Step 1:  Mix the Olive Oil and Sugar together to make the scrub


Step 2: Wash and clean your face with warm water to open your pores.


Step 3: Soak towel in warm-to-hot water


Step 4: Apply the scrub on your face in gentle circular motions


Step 5: Let the scrub sit for at least 5 minutes.


Step 6: Rinse the scrub with warm water


Step 7: Place the warm towel over your head for at least 5 minutes


Step 8: Wash your face with cool-to-cold water to close your pores

Wednesday, November 9, 2011

Recycling Facts

I found this in the ladies room of NAIA (Ninoy Aquino International Airport) Terminal 2, Arrivals.

Thought I'd share.

Sorry if the image is blurry. I took it in a hurry

  • Bathroom Tissue Dispeser Recycling Facts

The fact sheet was stuck onto an automatic tissue dispenser. It would have been better if the tissue dispenser didn't work with electricity to pull the sheets out.

Tuesday, November 8, 2011

Greenpeace Volunteer Orientation

I went to the Greenpeace Philippines HQ today for my volunteer orientation. I dragged boyfie into it and I must say that after the orientation, it seems that he's more interested than I am! WINNER!


The building's eerily cozy, with the ambiance that of a school. The office itself was rigged with biometric devices. It turns out it was a safety feature for a horrible harassment issue that happened to some volunteers and staff members.

I had a really nice time learning about Greenpeace, how it operates and it's core values. Not to mention that the staff that we met were really really warm and nice!

I'm excited to try out this new venture in my life and I hope I can dedicate much time for it!

HGTV Carter Can Eco-Friendly Home Improvements

Carter Can is a show from HGTV which aims to help people in renovating their homes. Whenever people think that it's impossible to renovate an area in the house due to budget and/or design constraints, Carter Comes in and saves the day. What's even greater is that Carter uses Eco-Friendly materials for the renovation.

I'm not a fan of watching T.V. but a few months ago, I chanced upon this T.V. show when my sister fell asleep while watching it. I thought, "Hey it's another home renovation show, I love these shows". I wasn't disappointed for watching it since I found out that Carter uses green materials for renovations. There's at least one piece of furniture that is eco-friendly! I love it! At the end of the show, they gave a URL to check out for more renovation and green ideas. It's http://hgtv.com/carter.


I browsed the website found some of the Eco-Friendly furniture and materials that Carter uses in the show. You may want to see the items. Check it out for Eco-Friendly materials for your next home improvement. (http://www.hgtv.com/home-improvement/going-green-eco-friendly-home-improvement-and-building-products/pictures/index.html).

Here are some of the materials and how they were used that I really loved:


Photo Used as Material
Paper Countertop Tree Pulp
Bamboo Plywood as Cabinet Doors, Drawers, and Sink Bamboo laminated together with low-VOC adhesive
Rubber Mulch Recycled Tires
Recycled Plastic Carpet PET plastic turned into yarn
Cork Flooring Cork Oak Bark
Bamboo Buthcer Block Formaldehyde-free Bamboo
Biodegradable Hemp and Wool Carpet Hemp and Wool Fibers
All these materials and how they are beneficial for use and for the environment can be found on HGTV. (http://www.hgtv.com/home-improvement/going-green-eco-friendly-home-improvement-and-building-products/pictures/index.html)