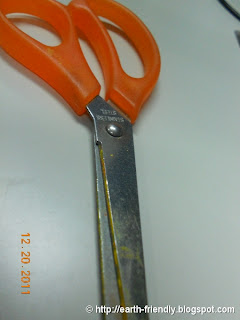
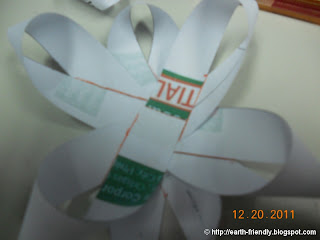
I used regular office paper with one side printed on. Below is my take on how about orange's paper gift bow.
Materials and Tools Needed:
Step 1: Cut 9 Paper strips
- Three (3) strips measuring the full 11 inches, 3/4 inches thick *
- Three (3) strips measuring 10 inches, 3/4 inches thick *
- Two (2) strips measuring 9 inches, 3/4 inches thick *
- One (1) strip measuring 3 1/2 inches., 3/4 inches thick *
Step 2: Twist and loop one end of the strip
Bring the end of the strip to the center to form one end of the ribbon. Hold it in place with your handStep 3: Twist and loop the other end of the strip
Bring the end of the strip to the center to form the other end of the ribbon. Hold it with your other (free) handStep 4: Adjust the ends of the strip to make the loops thinner.
The thinner it is, the better. Having wide or big ribbon loops will make it difficult to assemble the ribbon, not to mention that the ribbon will look cluttered with very wide loops.Step 5: Mark the places where the loops or ends of the strip meet.
Make sure you also mark the corners where the loops are. This is to ensure that you will be able to put back the loops later.Step 6: Glue the ends of the strip together
Apply the glue inside the marked areas in step 5 and stick the ends together. The lines you placed in Step 5 will help you form the shape of your strip without a hitch! Repeat this step with all the strips of paper except for the smallest (3 1/2 inch) strip. Form a ring with this strip instead. Group the riblets (the form the strips take after gluing together the ends) together according to length.Step 7: Form the base of the ribbon
Using the 3 longest riblets, form the base by creating a cross or plus-sign (+) with 2 riblets then place the last riblet at an angle that forms an X with the riblet on top. Make sure that you put glue at the center of each riblet or stack of ribletsStep 8: Form the second layer of the ribbon
Using the 3 mid-length riblets, form the 2nd layer by placing the riblets in areas where the loops don't overlap with the other riblet loops. Again, make sure that you put glue at the center of the ribbon we're formingStep 9: Form the 3rd layer of the ribbon
Using the 2 small riblets, form the 3rd layer by placing the riblets in areas where the loops don't overlap with the other riblet loops. At this point it's hard to find an angle to put in the 3rd layer riblets, but you'll manage. Again, make sure that you put glue at the center of the ribbon we're forming.Step 10: Finish the ribbon
Put the loop at the middle of the ribbon to finish it. My loops looks small because I flattened my riblets a lot during stacking, which left a big gap at the middle. I can opt to add more smaller sized riblets or just place a bigger paper ring inside
So what are you waiting for? Go forth and make these neat-o and pretty ribbons for your gift wrapping and decorating needs. This is exactly what I needed to wrap my revelation day present for the Kris Kringle that my friends and I started way back in November.
|
|
Tweet |


No comments:
Post a Comment